Android
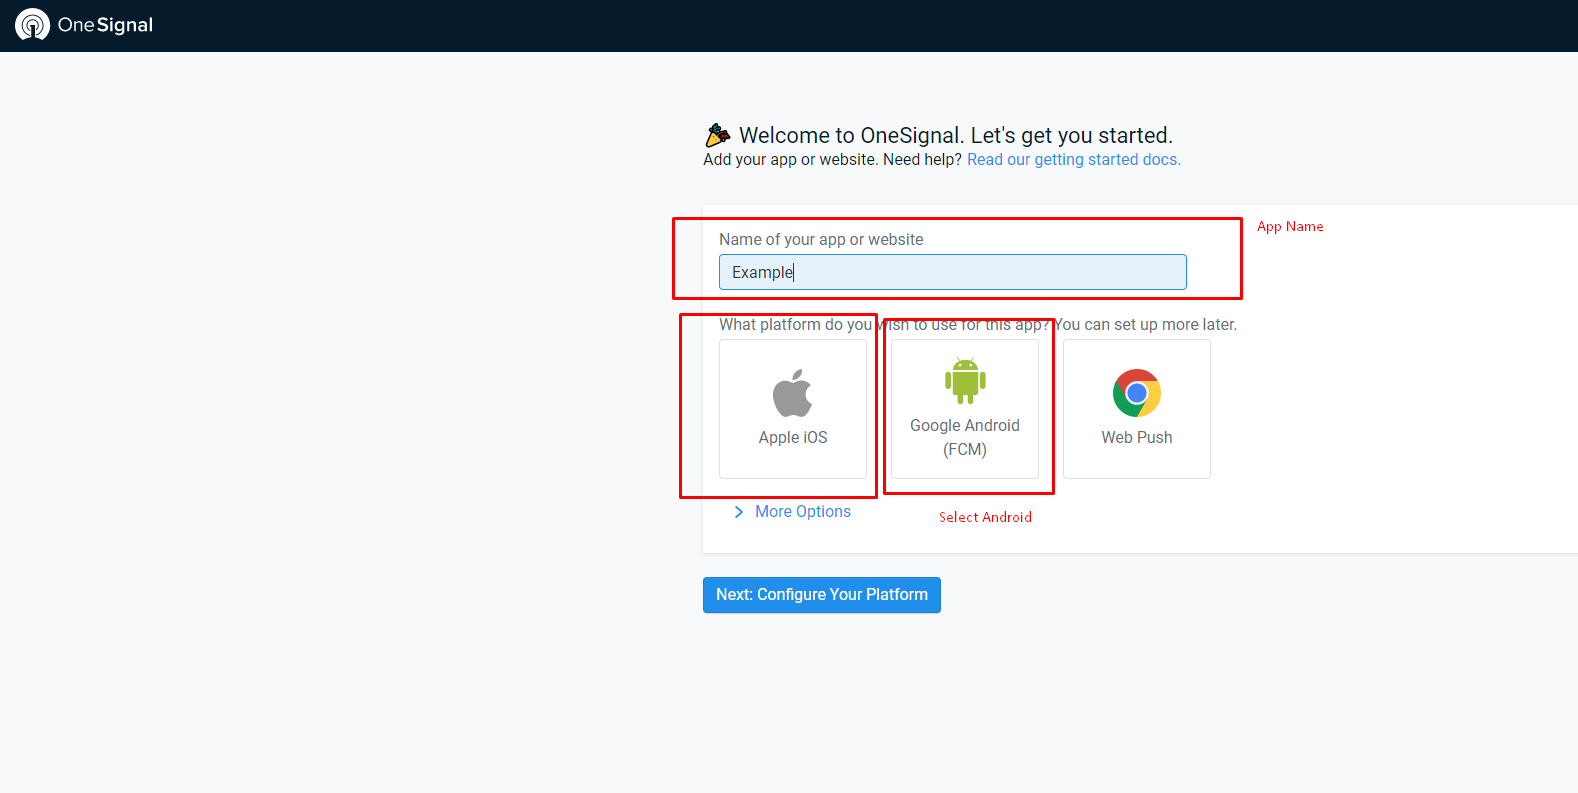
- Enter app name to Create Project
- Click on Continue
- Then you have to enter Firebase Cloud messaging key and sender ID
- To get Firebase Cloud messaging key and sender ID login to you Firebase project
- navigate to project setting and click on Cloud Messaging
- Copy/Paste Server key and sender ID to OneSignal and click
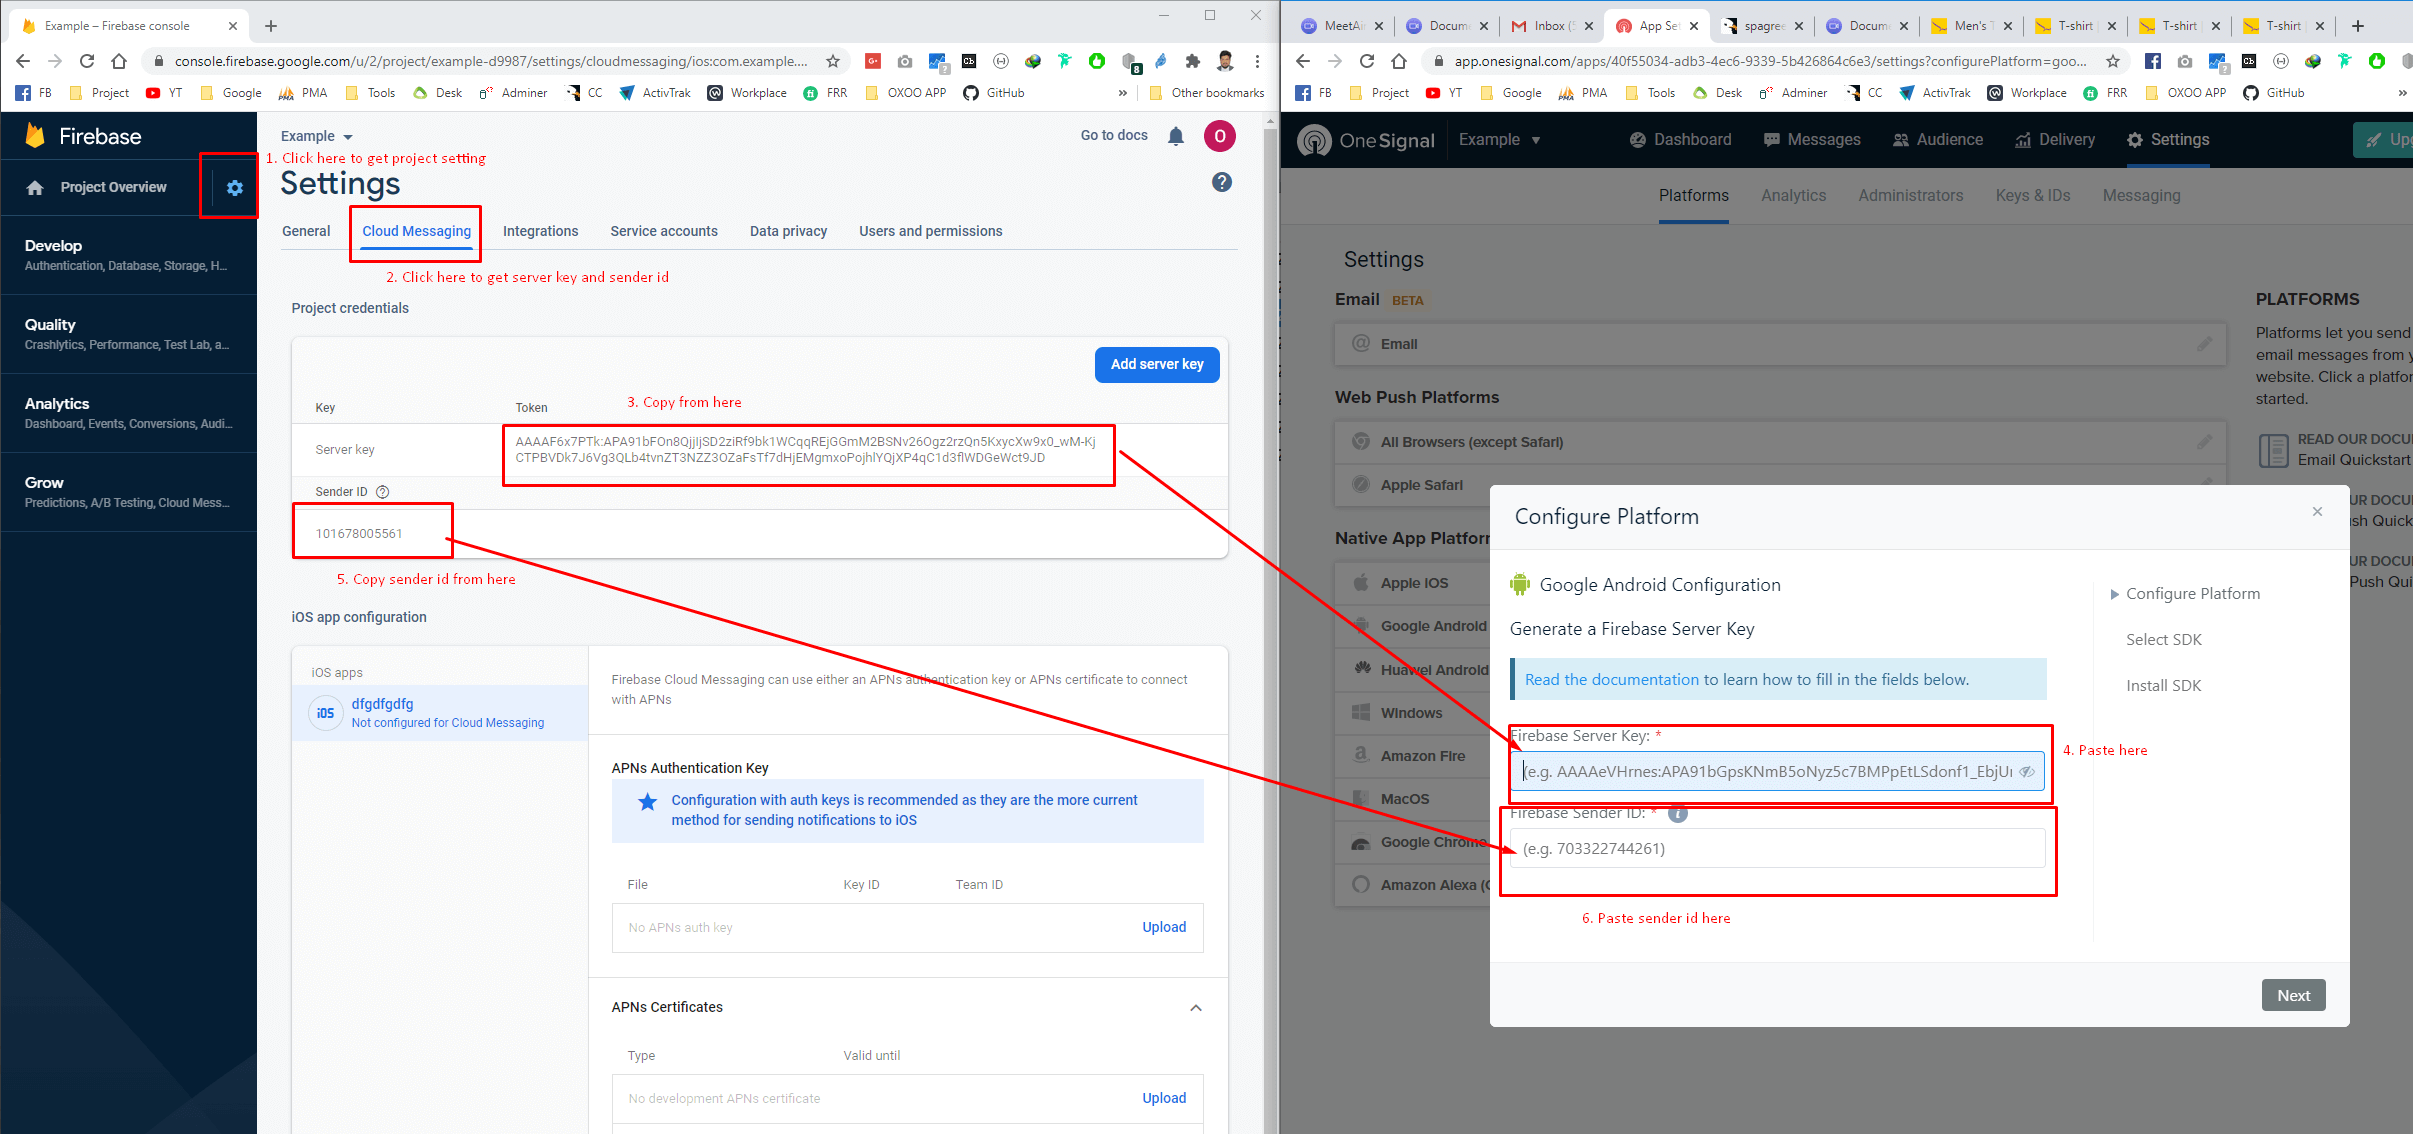
- Select Native Android then you can see APP ID
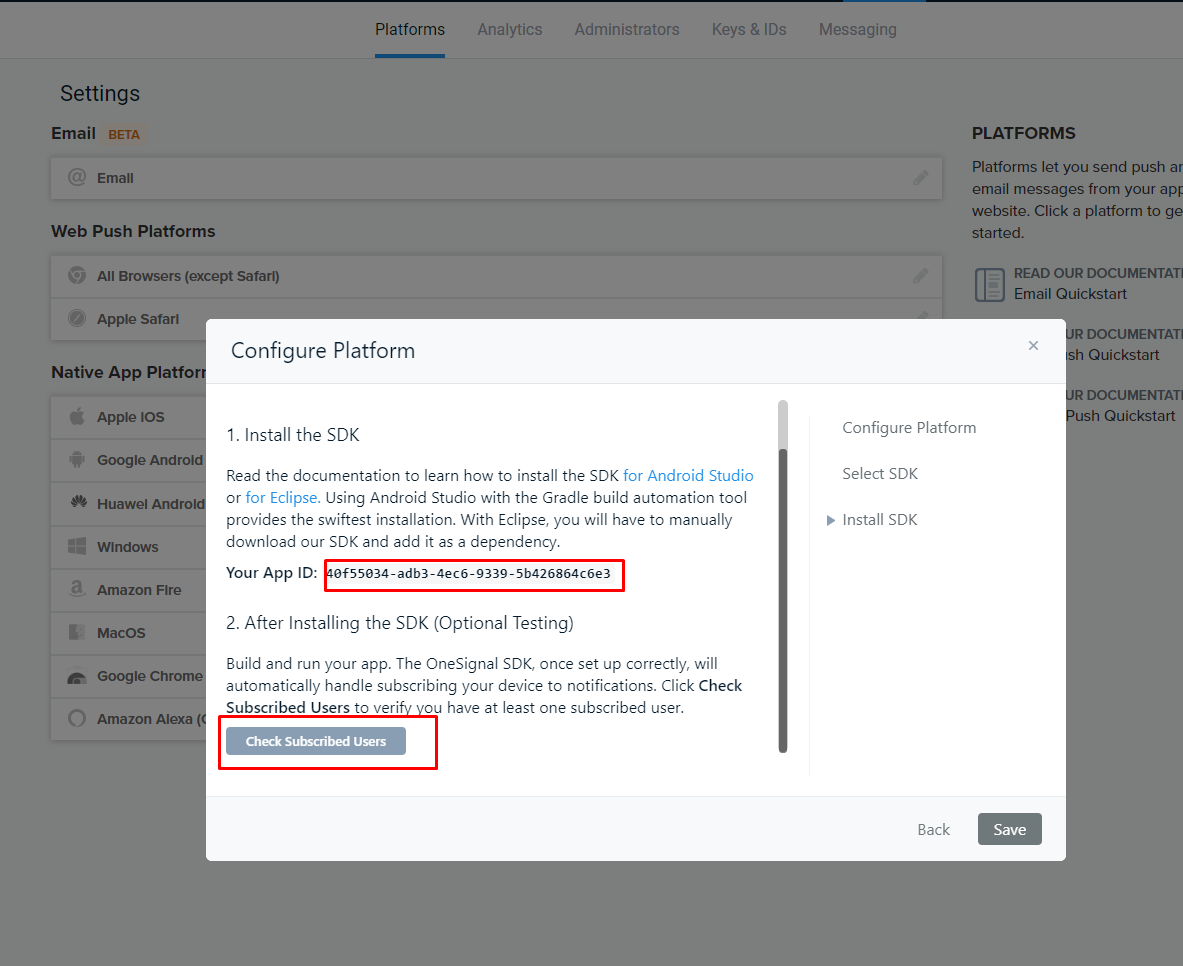
- Copy App ID and Paste to Android Studio Project config.dart
- Then run you project to emulator or real device.
- After run your project click on Check subscriber on OneSignal you will see success Notification
iOS
- First generate Production Certificate .p12 File: by OneSignal's Automatic Provisioning Tool or follow this Docs
- Download & Save Certificate and password carefully
- Click on iOS Icon Then select .p12 certificate from your computer.
- Select Native iOS then you can see APP ID
- Copy App ID and Paste to Android Studio Project config.dart if you have done it by android setup then just skip this step.
- Then run you project to emulator or real device.
- After run your project click on Check subscriber on OneSignal you will see success Notification.
- Then upload your .p8 and .p12 certificate to firebase cloud messaging